一直对云原生超级感兴趣,自己的博客、图床、资源站以及一些个人开发项目都打算用起来,但一直迫于成本太高。毕竟我现在所有的服务都是部署在两台 1c2g 的服务器上的,基本的 k8s 及类似生产环节可用的单节点部署方案都要 2c4g 才可。
加上部署也比较复杂,整个系统用在上规模的开发和生产一定很棒,但是入门起来真的门槛有点高。知道最近偶然看到国产的开源项目 KubeSphere,使用局域网内服务器部署了一下,真的立刻就体会到云原生的好处,于是就立刻用起来吧。
首先我需要找一台 2c4g 的服务器来使用,首先我使用的是 Digitalocean 新加坡节点,但是不知今天是怎么了,延迟高达 300ms+,命令行操作一卡一卡的,而且频繁丢包。
后来在 hostloc 扒了一圈,锁定了 3c 云,因为他们活动价的 香港2c4g活动机 才不到20元/月。就用它来体验一下吧。
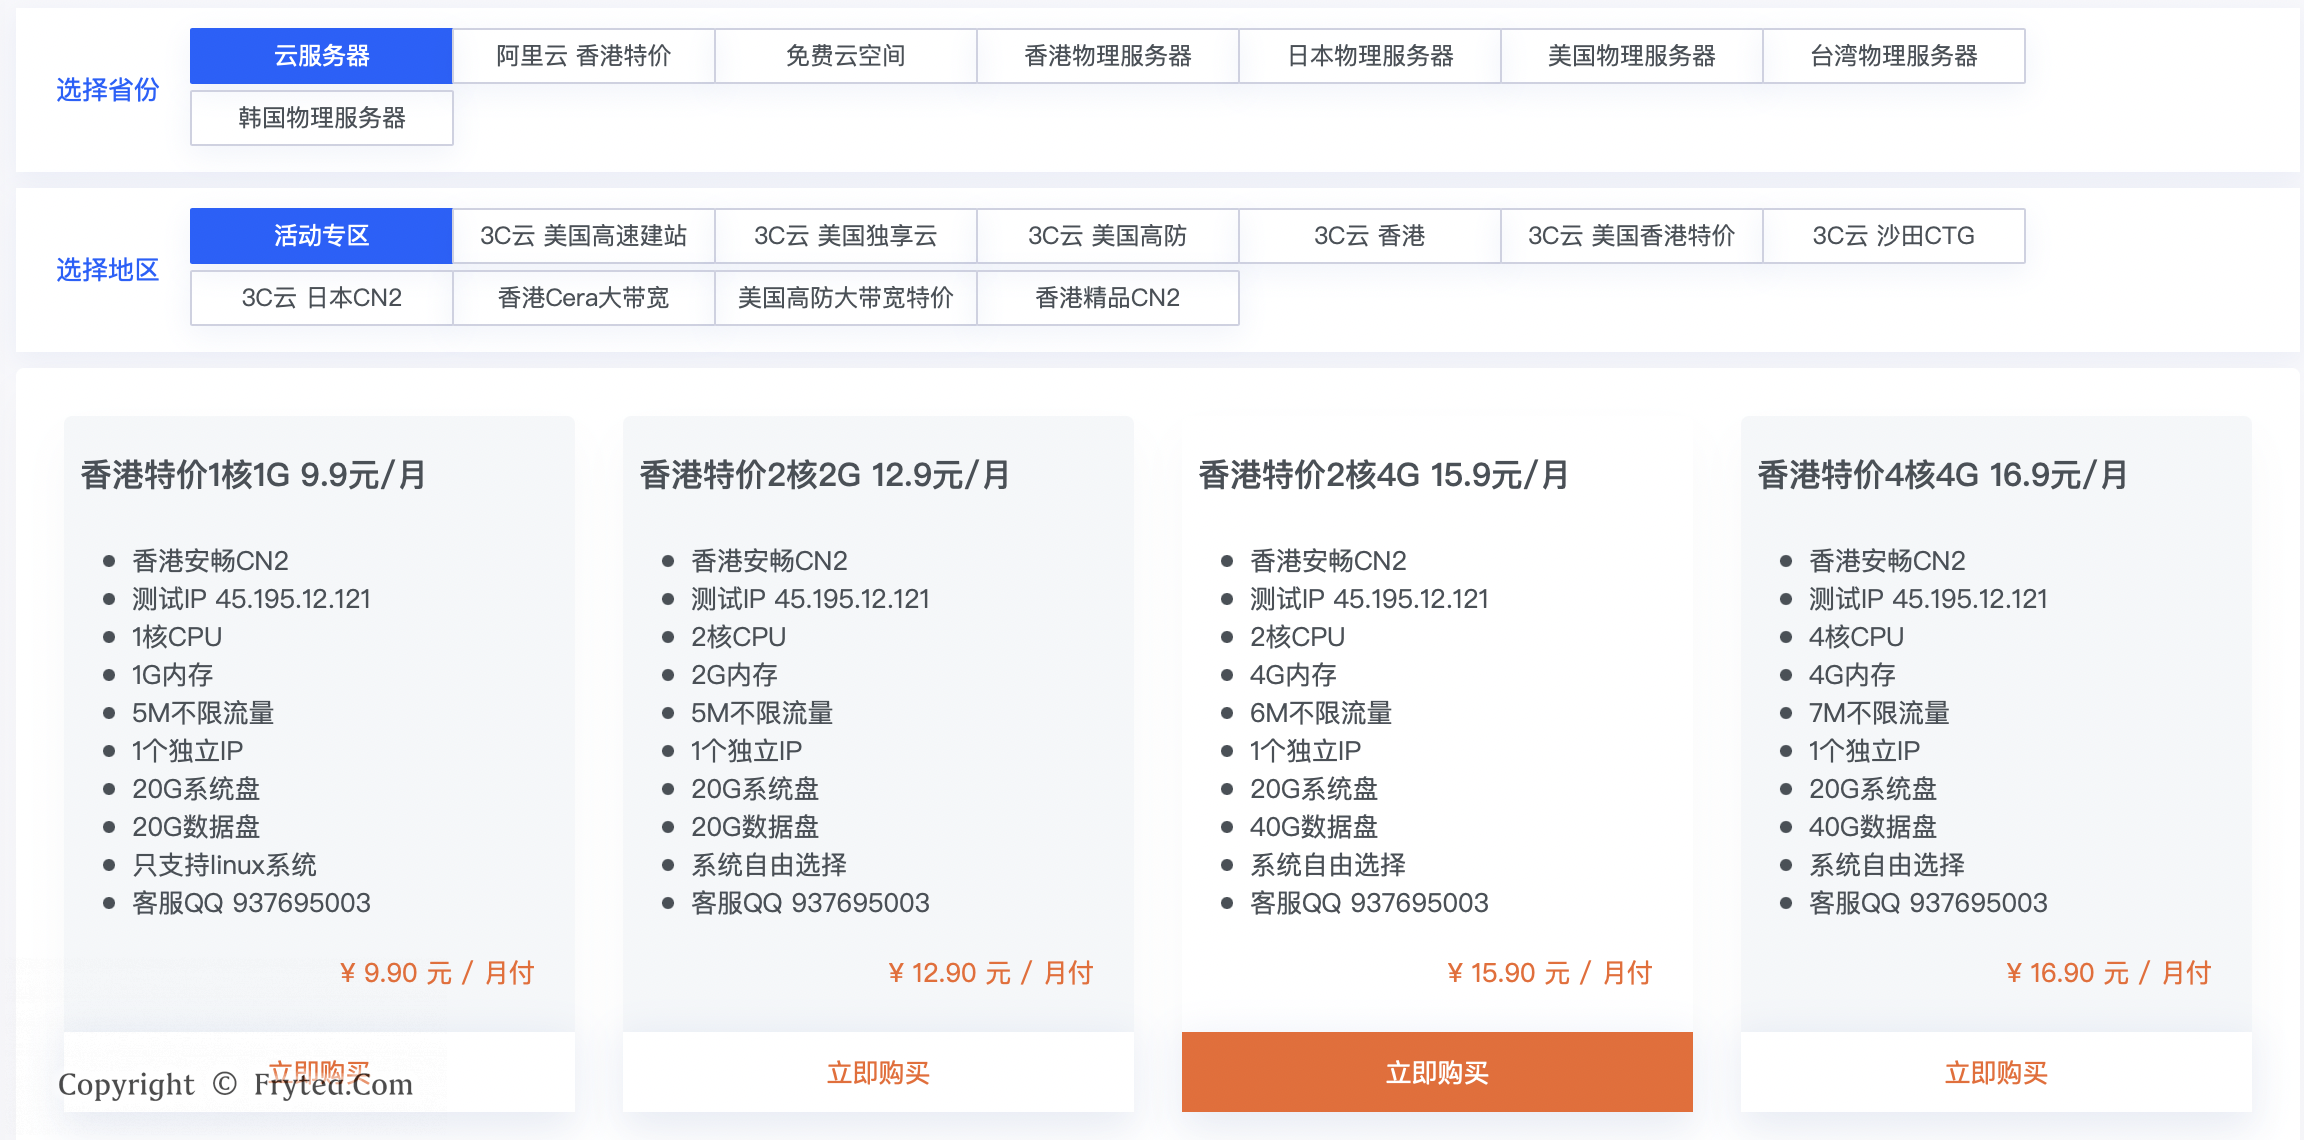
3C云环境测评
其实购买前一直想找一下测评,但是找了一圈发现没有,想了一下价格也不贵,买一个来试试吧。
先用 bench.sh 跑一下试试:
# wget -qO- bench.sh | bash

----------------------------------------------------------------------
 CPU Model             : Intel Xeon E312xx (Sandy Bridge, IBRS update)
 CPU Cores             : 2
 CPU Frequency         : 2199.998 MHz
 CPU Cache             : 4096 KB
 Total Disk            : 16.0 GB (1.8 GB Used)
 Total Mem             : 3951 MB (76 MB Used)
 Total Swap            : 4093 MB (0 MB Used)
 System uptime         : 0 days, 0 hour 36 min
 Load average          : 0.11, 0.07, 0.03
 OS                    : Ubuntu 18.04.4 LTS
 Arch                  : x86_64 (64 Bit)
 Kernel                : 4.4.0-87-generic
 TCP CC                : cubic
 Virtualization        : KVM
 Organization          : AS139640 HK NEW CLOUD TECHNOLOGY LIMITED
 Location              : Hong Kong / HK
 Region                : Central and Western
----------------------------------------------------------------------
 I/O Speed(1st run)    : 190 MB/s
 I/O Speed(2nd run)    : 185 MB/s
 I/O Speed(3rd run)    : 191 MB/s
 Average I/O speed     : 188.7 MB/s
----------------------------------------------------------------------
I/O看起来还不错,比我的腾讯云轻量高一点,不知道这么低的价格是怎么做到的。初期我也用不了这么好的资源,先凑合了。
KubeSphere 配置
按照 KubeSphere 官网提供的「在 Linux 上以 All-in-One 模式安装 KubeSphere」流程配置即可,下面简单整理一下:
首先获取配置工具 KubeKey
# curl -sfL https://get-kk.kubesphere.io | VERSION=v1.2.0 sh -

Downloading kubekey v1.2.0 from https://github.com/kubesphere/kubekey/releases/download/v1.2.0/kubekey-v1.2.0-linux-amd64.tar.gz ...

Kubekey v1.2.0 Download Complete!

# chmod +x kk
# ./kk create cluster --with-kubernetes v1.21.5 --with-kubesphere v3.2.0
+----------+------+------+---------+----------+-------+-------+-----------+--------+------------+-------------+------------------+--------------+
| name     | sudo | curl | openssl | ebtables | socat | ipset | conntrack | docker | nfs client | ceph client | glusterfs client | time         |
+----------+------+------+---------+----------+-------+-------+-----------+--------+------------+-------------+------------------+--------------+
| 3c-hk-ks | y    | y    | y       |          |       |       |           |        |            |             |                  | HKT 22:23:03 |
+----------+------+------+---------+----------+-------+-------+-----------+--------+------------+-------------+------------------+--------------+
3c-hk-ks: conntrack is required.
下面就是缺什么装什么了:
# apt-get install ebtables socat ipset conntrack nfs-common glusterfs-client -y
# curl -fsSL https://get.docker.com | bash -s docker

# ceph-client 貌似可要可不要,可以装一下
# wget -q -O- 'https://download.ceph.com/keys/release.asc' | sudo apt-key add -
# echo deb http://download.ceph.com/debian-octopus/ $(lsb_release -sc) main | sudo tee /etc/apt/sources.list.d/ceph.list
# sudo apt-get update && sudo apt-get install ceph-deploy
# ceph-deploy install ceph-client
# 记得在 /etc/hosts 将 ceph-client 解析到客户端,或是直接本地 127.0.0.1
建议安装的包都装了就是这样:
# ./kk create cluster --with-kubernetes v1.21.5 --with-kubesphere v3.2.0
+----------+------+------+---------+----------+-------+-------+-----------+----------+------------+-------------+------------------+--------------+
| name     | sudo | curl | openssl | ebtables | socat | ipset | conntrack | docker   | nfs client | ceph client | glusterfs client | time         |
+----------+------+------+---------+----------+-------+-------+-----------+----------+------------+-------------+------------------+--------------+
| 3c-hk-ks | y    | y    | y       | y        | y     | y     | y         | 20.10.11 | y          | y           | y                | HKT 22:52:12 |
+----------+------+------+---------+----------+-------+-------+-----------+----------+------------+-------------+------------------+--------------+

This is a simple check of your environment.
Before installation, you should ensure that your machines meet all requirements specified at
https://github.com/kubesphere/kubekey#requirements-and-recommendations

Continue this installation? [yes/no]:
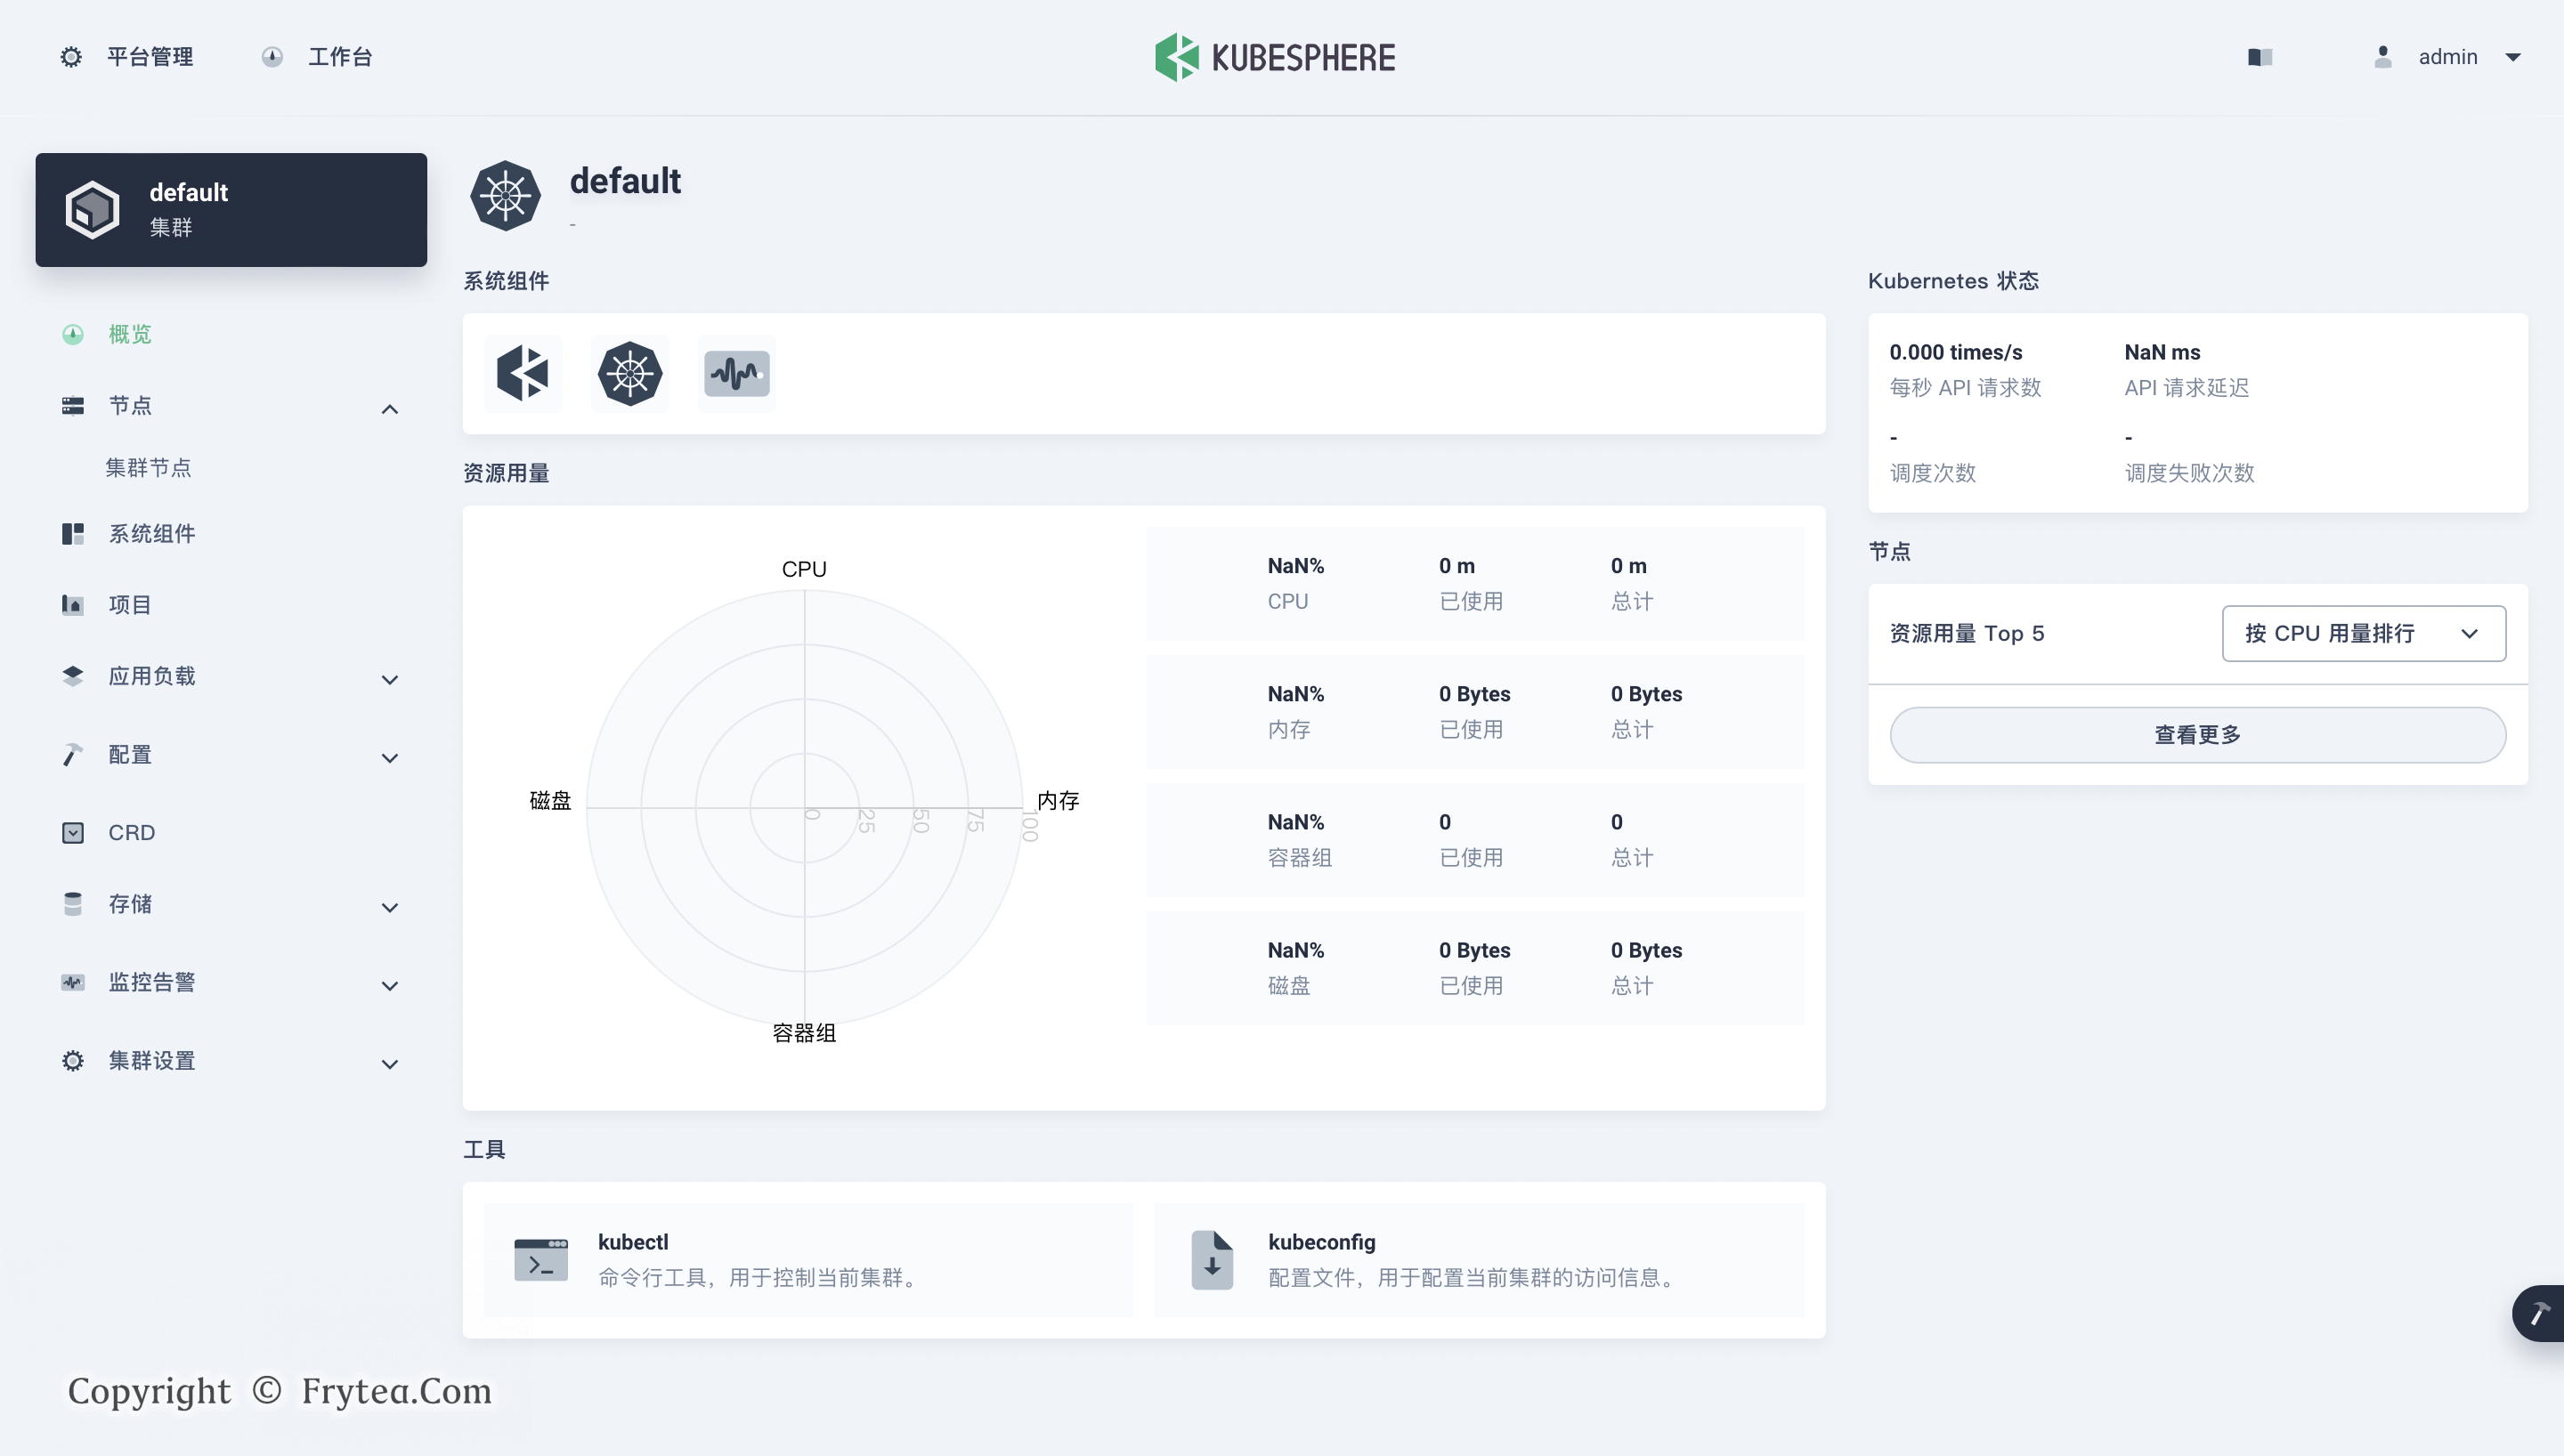
继续,等待成功即可,看到这些基本就成功了,进入网址看看:
#####################################################                                                                                                                                             [794/1947]
###              Welcome to KubeSphere!           ###
#####################################################

Console: http://********:30880
Account: admin
Password: P@88w0rd

NOTES:
  1. After you log into the console, please check the
     monitoring status of service components in
     "Cluster Management". If any service is not
     ready, please wait patiently until all components
     are up and running.
  2. Please change the default password after login.

#####################################################
https://kubesphere.io             2021-12-07 23:28:16
#####################################################
INFO[23:28:20 HKT] Installation is complete.

Please check the result using the command:

       kubectl logs -n kubesphere-system $(kubectl get pod -n kubesphere-system -l app=ks-install -o jsonpath='{.items[0].metadata.name}') -f
登陆就可以看到界面了,之后等待后台将各种参数配置:
后续按照官网文档,可以配置出各种玩法,若要在 KubeSphere 中启用其他组件,请参见启用可插拔组件。
插曲
- 香港服务器的网络配置
记录一个小经验,很久没有使用香港服务器,上来都不知道 DNS 和 apt 软件源该配谁了,上面脚本一直跑不过,后来才发现是 DNS 解析的锅,默认镜像配的 DNS 服务器在香港表现不佳,apt 软件源还配了一个 163 的,基本用不了。
最后把 DNS 配成谷歌的 8.8.8.8,再将软件源配成 ubuntu 官方在香港的节点( http://hk.archive.ubuntu.com/ubuntu/ )即可,装软件流畅多了,这才是香港服务器该有的样子。
- 云原生实验室
还是偶然进入 云原生实验室 博客,今儿了解到一群 KubeSphere 的维护者,为何都很愿意称自己为云原生的追随者,视其为一种信仰,近乎狂热,虽然有点不懂,但也许这其中真的有很吸引人的地方吧。
我现在能做的,只有先把这些东西用起来,慢慢适应,再尝试靠近。
Q&A
sudo: unable to resolve host 3c-hk-ks
如果出现 sudo: unable to resolve host 3c-hk-ks 错误,只需将主机名解析道 127.0.0.1 放到 /etc/hosts 文件中即可,比如这样。
# cat /etc/hosts
127.0.0.1       localhost
127.0.0.1       3c-hk-ks